Call
Luniversity에 오신 여러분을 환영합니다!😆 앞서 진행했던 Event와 Log는 재밌게 보고 오셨나요? 이제 여러분은 이더리움 네트워크에서 컨트랙트의 Method가 실행될 때 데이터를 블록에 저장하는 방법과 이를 확인하는 방법을 알게 되었습니다.
아직 진행하지 않았다면 Event / Log 파트를 진행해 보며 Event와 Log가 무엇인지, 실제 저장은 어떻게 되는지 확인해 보세요!
이번 시간에는 이더리움 환경에서 개발할 때 항상 등장하는 Call이 무엇인지 알아보는 시간을 갖도록 하겠습니다.
Call 이란?
Call은 컨트랙트간 상호작용을 가능하게 하는 Method 호출하는 일종의 프록시 패턴의 Method 호출 방법입니다.
- 프록시(Proxy) 패턴이란?
소프트웨어 개발에서 사용되는 디자인 패턴 중 하나로 객체 사이의 상호작용을 위해 대리자 객체를 이용하는 방식을 의미합니다.
이더리움에서는 유저의 호출을 받는 대리자 컨트랙트를 프록시 컨트랙트라고 하며 프록시 컨트랙트를 통해 실제 Method를 실행하는 컨트랙트를 로직 컨트랙트라고 합니다.
예를 들어 유저가 컨트랙트 A를 통해 컨트랙트 B의 Method를 호출하는 것을 Call 이라고 하며 이더리움에서는 이러한 Call을 3가지로 분류합니다.
- Message call
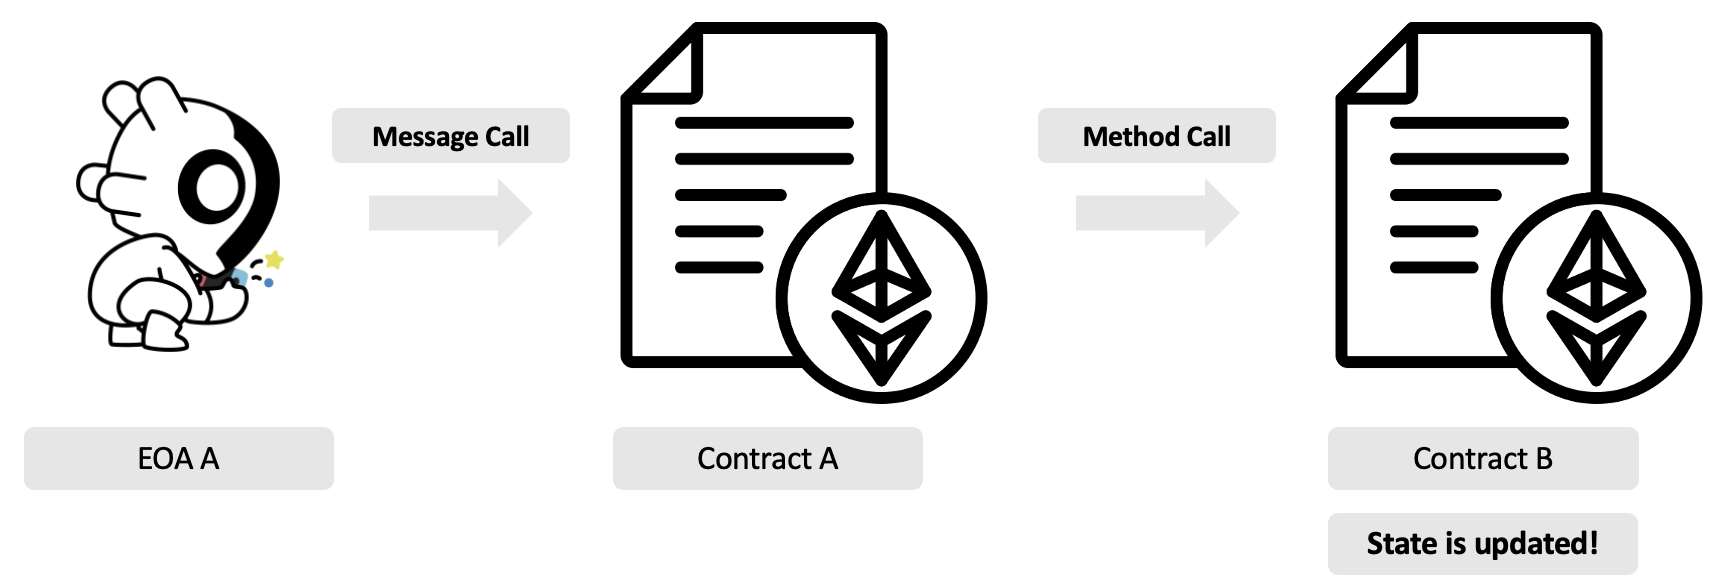
컨트랙트를 이용하여 다른 컨트랙트의 Method 호출하는 가장 일반적인 방법 입니다. 아래 그림을 예시로 볼까요? 유저가 Contract A의 Message Call Method를 호출합니다. Contract A가 Contract B의 Method를 Message Call로 호출하여 Contract B에 작성된 Method를 실행하고, 그 결과에 따라 Contract B의 Storage를 업데이트하게 됩니다.
- Delegate Call
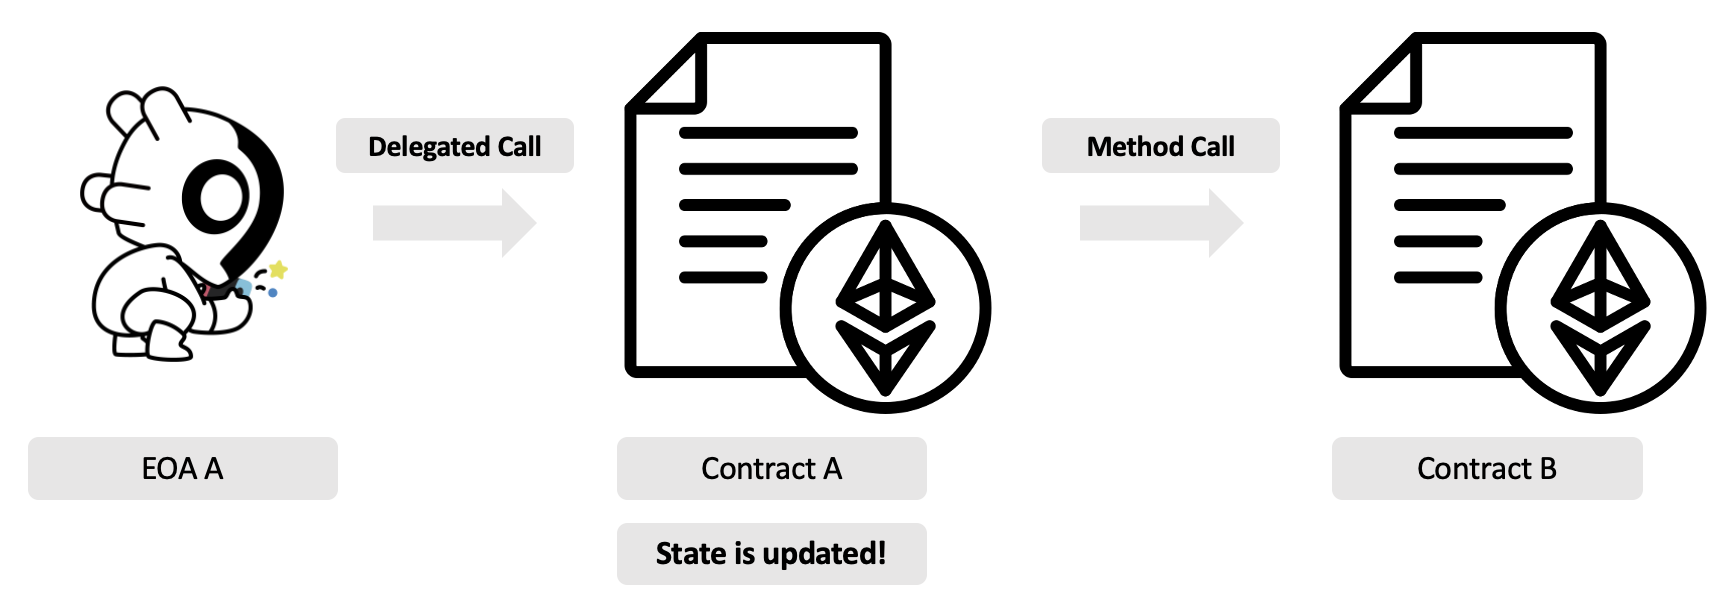
Delegate Call도 Message Call과 같이 컨트랙트에서 다른 컨트랙트의 Method를 호출합니다. Message Call과의 차이점은 프록시 컨트랙트가 로직 컨트랙트의 코드만 그대로 가져와 실행한다는 점입니다. 이렇게 될 경우, Method 실행의 결과로 프록시 컨트랙트의 Storage가 업데이트 됩니다.
Message Call과 비슷해 보이는 Delegate Call은 왜 필요할까요? 바로 Delegate Call을 이용하는 프로세스 일 경우, 필요 시 로직 컨트랙트를 수정할 수 있기 때문입니다! 블록체인에 기록된 컨트랙트 코드는 수정이 불가능한데 어떻게 이미 배포된 컨트랙트를 수정할 수 있을까요?
앞서 말씀드린 대로 Delegate Call은 프록시 컨트랙트에 Storage를 사용하고 로직 컨트랙트의 코드만 가져와 실행하는 형태입니다. 그렇기 때문에 수정된 로직 컨트랙트를 새롭게 배포한 뒤, 프록시 컨트랙트가 호출하는 로직 컨트랙트의 주소만 변경해 준다면 코드는 수정된 버전으로, Storage에 있는 데이터는 변경 없이 사용할 수 있게 되는 것입니다.
Message Call의 경우, 로직 컨트랙트의 Storage에서 데이터를 참조하여 Method를 실행하기 때문에 로직 컨트랙트를 변경하는 순간 참조해야 하는 Storage의 데이터가 변경되어 문제가 발생할 수 있습니다. 그러나 Delegate Call의 경우, 프록시 컨트랙트의 Storage의 데이터를 참조하므로 로직 컨트랙트를 변경하더라도 프록시 컨트랙트만 변경되지 않는다면 사용 중이던 데이터를 그대로 사용할 수 있습니다. 다만 중요한 점은 Delegate Call을 이용하려 할 때 프록시 컨트랙트와 로직 컨트랙트의 Storage Layout이 똑같이 구성되어 있어야 합니다. Storage Layout의 구조가 다를 경우, Storage Slot이나 변수의 크기가 달라져 예상과는 전혀 다른 실행 결과가 나올 수 있기 때문입니다.
- Static call
Call의 종류 중 하나로 다른 컨트랙트의 Method를 호출할 때, 해당 Method가 컨트랙트의 State를 변경하지 않고 데이터를 읽기만 할 때(Read-Only) 사용됩니다. 컨트랙트 호출 시 발생하는 가스 비용을 낮출 수 있기 때문에 불필요한 상태 변경을 방지하고 가스 비용을 절약하는 Call 입니다.
Call 호출 및 결과 확인
Node를 이용하기 위한 RPC-Endpoint 구하기Node를 이용하기 위해서는 해당 Node를 특정하는 RPC-Endpoint가 필요합니다. 아래 링크를 통해 Nova에서 제공하는 RPC-Endpoint를 얻을 수 있습니다. RPC-Endpont는 네트워크 별로 달라질 수 있으며 현재 Luniverse에서 제공하는 Ethereum의 네트워크는 Mainnet, Goerli, Sepolia 입니다.
INSTALLATION예제를 실행하기 위해서는 라이브러리를 설치해야 합니다. 아래 명령어를 입력하여 필요한 라이브러리를 설치할 수 있습니다.
$ npm install ethers@5
이제 Call에 대해서 알게 되었으니 실제 해당 기능을 실행해 보며 차이점을 확인해 보도록 하겠습니다. 배포할 컨트랙트는 number를 변경하고 number를 확인하는 기능을 가진 컨트랙트로 Logic 컨트랙트에는 number를 변경할 수 있는 setNumber와 현재 저장된 number를 확인할 수 있는 getNumber Method를 작성합니다. 컨트랙트의 이름은 LogicContract입니다.
그리고 Proxy 컨트랙트에는 Call, Delegate Call, Static Call을 호출하는 Method와 Proxy 컨트랙트의 number를 확인할 수 있는 getNumber, 그리고 Logic 컨트랙트의 number를 확인할 수 있는 getNumberFromLogic Method를 작성합니다. 컨트랙트의 이름은 CallFunctions입니다. 이렇게 완성된 컨트랙트는 다음과 같습니다.
(실제 구현되어 사용되는 Proxy 컨트랙트와 구조 상의 차이가 있을 수 있으나 Logic 컨트랙트와 Proxy 컨트랙트를 쉽게 구분하기 위해 Proxy라는 용어를 사용하도록 하겠습니다.)
// SPDX-License-Identifier: UNLICENSED
pragma solidity ^0.8.0;
contract LogicContract {
uint256 private number;
function setNumber(uint256 _number) public {
number = _number;
}
function getNumber() public view returns (uint256) {
return number;
}
}
contract ProxyContract {
uint public number;
LogicContract public logicContract;
constructor(address _logicContractAddress) {
logicContract = LogicContract(_logicContractAddress);
}
function setNumberWithCall(uint _number) public {
(bool success,) = address(logicContract).call(abi.encodeWithSignature("setNumber(uint256)", _number));
require(success, "Call failed");
}
function setNumberWithDelegateCall(uint _number) public {
(bool success,) = address(logicContract).delegatecall(abi.encodeWithSignature("setNumber(uint256)", _number));
require(success, "Delegate call failed");
}
function getNumberFromLogic() public view returns (uint) {
return logicContract.getNumber();
}
function getNumber() public view returns (uint) {
return number;
}
function getNumberWithStaticCall() public view returns (uint) {
(bool success, bytes memory data) = address(logicContract).staticcall(abi.encodeWithSignature("getNumber()"));
require(success, "Static call failed");
return abi.decode(data, (uint));
}
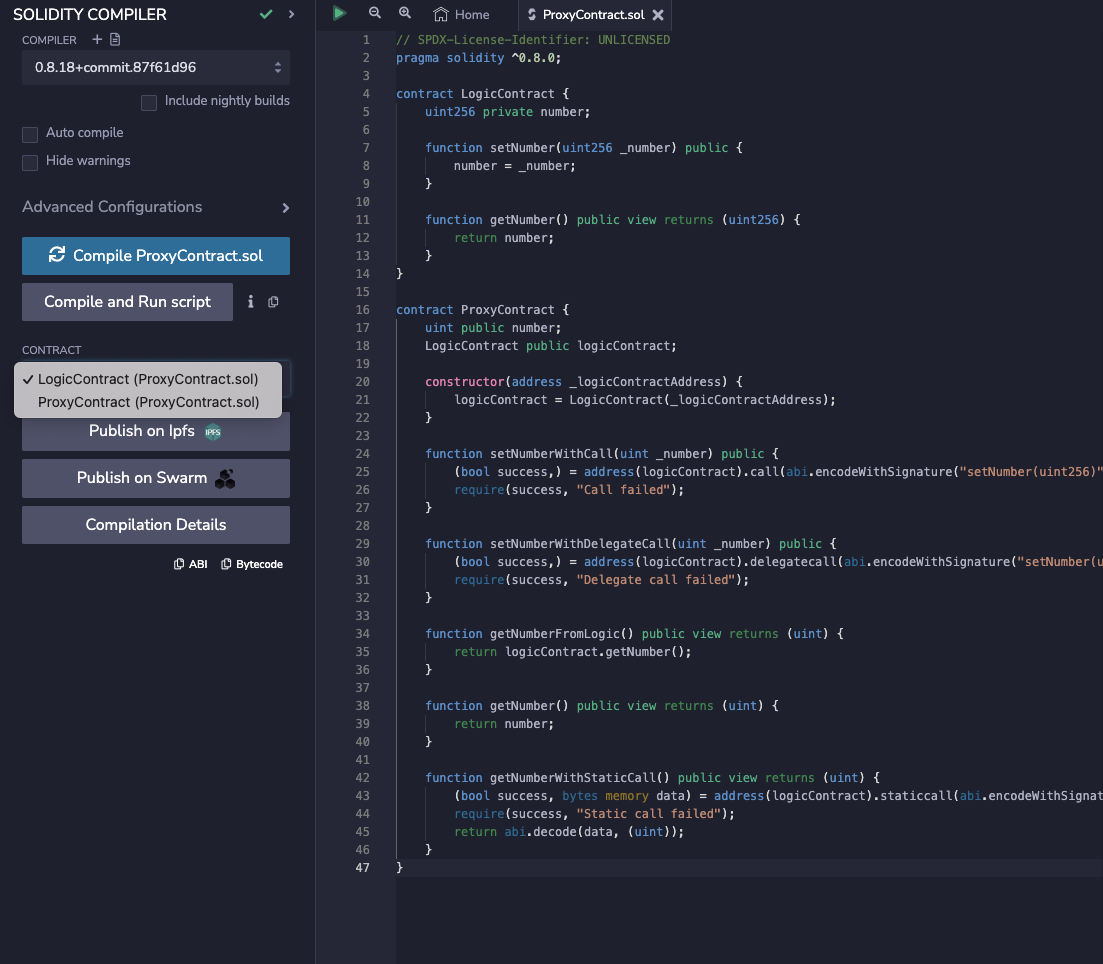
}Solidity를 이용하여 컨트랙트를 컴파일 및 배포, 테스트할 수 있는 기능을 제공하는 Remix IDE를 이용하여 위의 컨트랙트를 컴파일 합니다. 이렇게 컴파일 된 컨트랙트는 각 컨트랙트 별로 ABI와 Bytecode를 제공합니다.
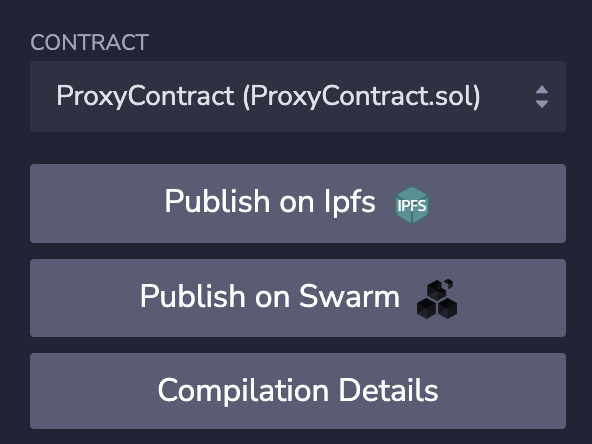
ProxyContract 컨트랙트의 경우, constructor의 값으로 Logic 컨트랙트의 Address를 필요로 하기 때문에 우선 Logic 컨트랙트를 먼저 이더리움 네트워크에 배포하여 컨트랙트의 Address를 추출합니다.

ethers.js와 Remix IDE에서 복사한 ABI, Bytecode를 이용하여 이더리움 네트워크에 Logic 컨트랙트를 배포합니다. 배포하는 코드는 다음과 같습니다. Bytecode와 ABI로 배포할 컨트랙트를 특정하며 Nova에서 제공하는 RPC를 이용해 이더리움 Sepolia 테스트넷에 연동하여 배포합니다. 실행의 결과로 배포된 컨트랙트의 주소를 반환받을 수 있습니다.
const { ethers } = require("ethers");

const privateKey = "{Your Private Key}";
const nodeId = "{Your Node ID}"
const bytecode = "{Logic Contract bytecode}";
const abi = [
  {Logic Contract ABI}
]

const provider = new ethers.providers.JsonRpcProvider(`https://ethereum-sepolia.luniverse.io/${nodeId}`);
const privateKey = "{Your Private Key}";
const wallet = new ethers.Wallet(privateKey, provider);
const contractFactory = new ethers.ContractFactory(abi, bytecode, wallet);
contractFactory.deploy()
  .then((deployedContract) => {
    console.log(`Logic Contract deployed at address: ${deployedContract.address}`);
  })
  .catch((error) => {
    console.log(`Error deploying contract: ${error}`);
  });
이후 Proxy 컨트랙트의 Bytecode와 ABI를 복사하여 입력한 후, constructorArgs라는 변수를 이용하여 Consturtor 인자를 추가로 입력합니다. 이후 이 코드를 실행시켜 Proxy 컨트랙트를 이더리움 Sepolia 테스트넷에 배포한 후 Proxy 컨트랙트의 주소를 반환받습니다. 코드는 다음과 같습니다.
const { ethers } = require("ethers");

const constructorArgs = ["{Logic Contract Address}"];
const bytecode = "{Proxy Contract bytecode}";
const abi = {Proxy Contract ABI};

const provider = new ethers.providers.JsonRpcProvider('https://ethereum-sepolia.luniverse.io/{Your Node ID}');
const privateKey = "{Your Private Key}";
const wallet = new ethers.Wallet(privateKey, provider);
const contractFactory = new ethers.ContractFactory(abi, bytecode, wallet);
contractFactory.deploy(...constructorArgs)
  .then((deployedContract) => {
    console.log(`Proxy Contract deployed at address: ${deployedContract.address}`);
  })
  .catch((error) => {
    console.log(`Error deploying contract: ${error}`);
});- Message Call
Logic 컨트랙트와 Proxy 컨트랙트를 모두 배포하였다면 ethers.js를 이용하여 Message Call, Delegate Call, Static Call을 실행해 보도록 하겠습니다. 우선 Message Call을 호출하여 number를 변경합니다. Message Call이 실행되는 프로세스는 유저가 Proxy 컨트랙트에 Message Call을 호출하는 Method를 실행하고 Proxy 컨트랙트가 Logic 컨트랙트의 Method를 호출하여 실행하는 구조입니다.
그렇기 때문에 컨트랙트에 아래 코드와 같이 Logic Contract에 Call을 호출하여 setNumber를 실행하는 로직이 작성되어 있습니다.
function setNumberWithCall(uint _number) public {
        (bool success,) = **address(logicContract).call**(abi.encodeWithSignature("setNumber(uint256)", _number));
        require(success, "Call failed");
    }
이러한 Method를 호출하기 위해 Proxy 컨트랙트의 ABI와 Bytecode를 이용하여 해당 Method를 호출합니다. 코드는 다음과 같습니다. 변수 newNumber를 이용해 입력한 숫자로 변경하는 Call을 호출합니다. 호출에 성공을 했다면 트랜잭션 Hash를 반환받습니다.
const { ethers } = require("ethers");

const privateKey = "{Your Private Key}";
const nodeId = "{Your Node ID}";
const contractAddress = '{Proxy Contract Address}';
const newNumber = "{New number}";
const abi = [
  {Proxy Contract ABI}
];

const provider = new ethers.providers.JsonRpcProvider(`https://ethereum-sepolia.luniverse.io/${nodeId}`);
const wallet = new ethers.Wallet(privateKey, provider);
const contract = new ethers.Contract(contractAddress, abi, wallet);
contract.setNumberWithCall(newNumber)
  .then((tx) => {
    console.log('Transaction hash:', tx.hash);
  })
  .catch((err) => {
    console.error('Failed to set message:', err);
});- Delegate Call
Call을 이용하여 setMessage를 한 코드와 동일한 코드를 이용해서 Delegate Call Method를 실행할 수 있습니다. 실행하는 코드는 다음과 같습니다. 변경할 number를 입력한 후 해당 코드를 실행하여 Delegate Call을 호출합니다. 트랜잭션 Hash를 반환받으면 Delegate Call 호출에 성공한 것입니다.
const { ethers } = require("ethers");

const privateKey = "{Your Private Key}";
const nodeId = "{Your Node ID}";
const contractAddress = '{Proxy Contract Address}';
const newNumber = "{New number}";
const abi = [
  {Proxy Contract ABI}
];

const provider = new ethers.providers.JsonRpcProvider(`https://ethereum-sepolia.luniverse.io/${nodeId}`);
const wallet = new ethers.Wallet(privateKey, provider);
const contract = new ethers.Contract(contractAddress, abi, wallet);
contract.setNumberWithDelegateCall(newNumber)
  .then((tx) => {
    console.log('Transaction hash:', tx.hash);
  })
  .catch((err) => {
    console.error('Failed to set message:', err);
});- 응답 확인
실제로 입력한 값이 어떻게 저장되어 있는지 확인합니다. Proxy Contract에 작성된 getNumber,getNumberFromLogic,getNumberWithStaticCall Method를 이용합니다. 배포한 Proxy Contract의 코드를 확인해 보면 getNumber는 Proxy Contract의 number를, getNumberFromLogic, getNumberWithStaticCall은 Logic Contract의 number를 조회합니다. 코드는 아래와 같습니다.
const { ethers } = require("ethers");
const privateKey = "{Your Private Key}";
const nodeId = "{Your Node ID}";
const contractAddress = '{Proxy Contract Address}';
const abi = [  { Proxy Contract ABI }];
const provider = new ethers.providers.JsonRpcProvider(`https://ethereum-sepolia.luniverse.io/${nodeId}`);
const wallet = new ethers.Wallet(privateKey, provider);
const contract = new ethers.Contract(contractAddress, abi, wallet);

contract.getNumber()
.then((result) => {
console.log('Get number from Proxy Contract :', parseInt(result._hex, 16));
})
.catch((err) => {
console.error('Failed to get number:', err);
});

contract.getNumberFromLogic()
.then((result) => {
console.log('Get number from Logic Contract :', parseInt(result._hex, 16));
})
.catch(
	(err) => {
	console.error('Failed to get number:', err);
});

contract.getNumberWithStaticCall()
.then((result) => {
console.log('Get number from Logic Contract by static call :', parseInt(result._hex, 16));
})
.catch((err) => {
console.error('Failed to get number:', err);
});
위의 코드를 실행하면 다음과 같이 각 컨트랙트의 Storage에 저장된 number의 값이 다른 것을 확인할 수 있습니다. Delegate Call과 Message Call의 값으로 입력한 number가 일치하는지 확인해 보세요!
Get number from Logic Contract by static call : 1000
Get number from Proxy Contract : 500
Get number from Logic Contract : 1000
앞서 이론으로 배운 것 처럼, Message Call을 호출할 경우, Logic 컨트랙트의 Storage 값이, Delegate Call을 호출할 경우, Proxy 컨트랙트의 Storage 값이 변경되는 것을 확인할 수 있습니다. 위의 예시 코드에는 작성되어 있지 않지만, Proxy 컨트랙트에서 Logic 컨트랙트의 주소를 변경할 수 있는 로직만 추가한다면 새로 배포한 컨트랙트를 이용할 수 있습니다. 이러한 컨트랙트 구현 방법을 Proxy Upgrade Pattern이라고 합니다.
이번 시간에는 Call에 대해서 알아보고 실제 Message Call, Delegate Call, Static Call을 호출해 볼 수 있는 컨트랙트를 배포하고 모든 Call을 경험해 보았습니다. 각 Call이 어떤 차이가 있는지 확인이 되셨나요?
다음 시간에는 블록체인의 핵심 기술 중 하나인 Smart Contract가 무엇인지, 어떻게 배포하고 사용할 수 있는지 알아보는 시간을 갖도록 하겠습니다!
Luniverse는 Public Blockchain을 손 쉽게 이용할 수 있도록 다양한 API와 Node Provider Service를 제공하고 있습니다. 오늘 학습한 내용 외에도 다양한 API를 제공하고 있으며 *여기(Luniverse Multichain API 확인하기)를 클릭하여 Nova가 제공하는 다양한 API를 확인해 볼 수 있습니다! 😄😄
Updated 4 months ago